How to Prep & Use a Candy Mold
What You’ll Need:
- Candy mold
- Candy melts
- Bowl
- Rubber spatula
- Quart-sized resealable plastic bag
- Scissors
- Parchment paper
Steps:
- Clean out the details of the candy mold using warm water only, no soap. Dry each cavity in the mold with a paper towel or microfiber cloth to ensure no water spots remain.
- Microwave candy melts in a glass or ceramic bowl in 20-second intervals until melted. Stir candy melts in between intervals.
- Use a spatula to fill one corner of the bag with the melted candy melts. Snip a small corner off the tip of the plastic bag and squeeze the candy towards this corner. Twist the top of the bag closed.
- Pipe the candy melts into the candy mold, taking care to fill in all the edges and crevices. Tap the mold gently on the counter to release any air bubbles.
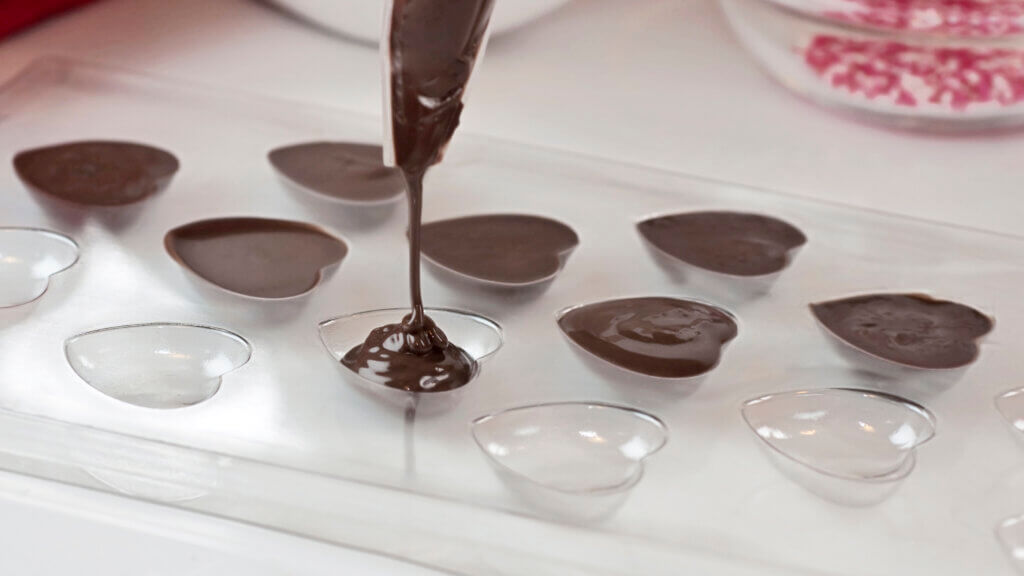
- Place the filled mold into the fridge for 20-30 minutes or until the bottom of the mold appears cloudy – this means the candy has set.
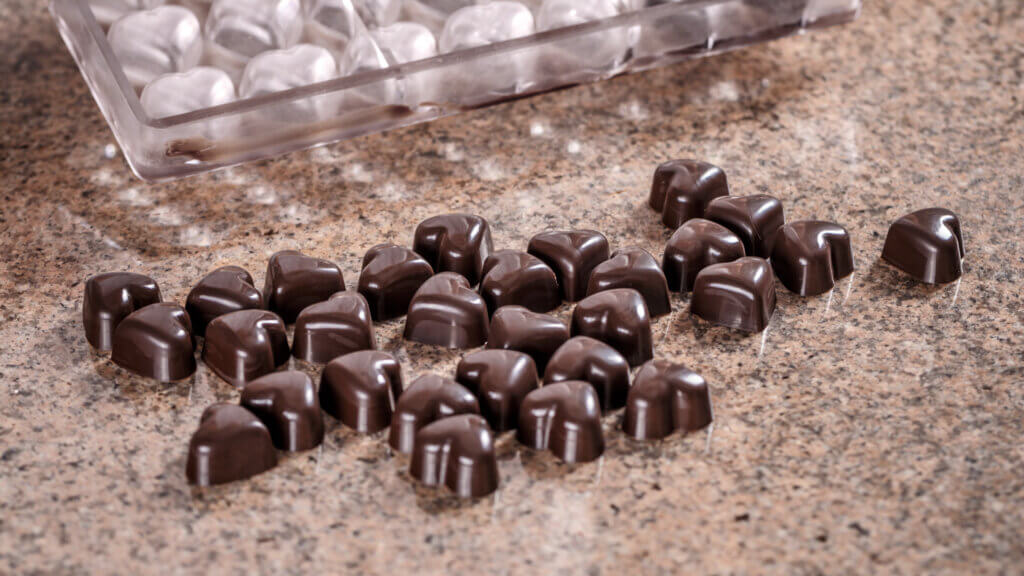
- Remove the candies from the mold by turning the mold over onto a flat surface covered in parchment paper. Gently tap the mold and the candies will fall out.
Pro Tips:
- Paint a candy masterpiece: Use plastic bristled paintbrushes to paint different colored candy melts into the details of your mold.
- Freeze ‘em out: If you have trouble getting the candies to release from the molds, place the mold in the freezer for five minutes or less.
Practice using a candy mold and share your creations with us on Instagram and Twitter. #BetterYourBake